
Step-by-Step Calibration Guide for 7200 Proximity Systems (5mm/8mm) to Maintain DCS/PLC Input Accuracy
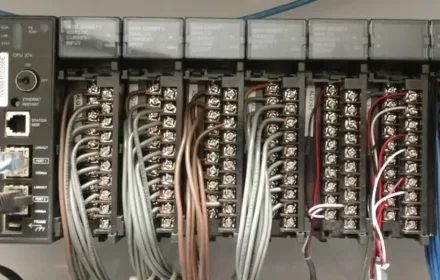
As an operations manager with 15 years in industrial controls, I’ve seen firsthand how critical accurate sensor data is. From Bentley Nevada to GE and AB systems, the core principle remains: your control system is only as good as the data it receives. This guide will walk you through calibrating your 7200 Proximity Systems (5mm/8mm). This ensures your DCS (Distributed Control System) or PLC (Programmable Logic Controller) always gets precise input.

Why Calibration Matters: My Perspective
Many engineers view calibration as a routine task. I see it as the heartbeat of reliable machinery. Incorrect calibration can lead to false alarms, missed critical events, and even costly downtime. With 7200 systems, which are fundamental for vibration monitoring in rotating machinery, maintaining accuracy is paramount. My unique insight? Don’t just follow the steps; understand the why. A properly calibrated proximity probe tells you the exact shaft position and vibration. This allows for proactive maintenance, saving you significant headaches and money in the long run.
Tools You’ll Need
- Calibration Fixture: Specific to 7200 series, often a Bently Nevada part.
- Micrometer or Caliper: For precise gap measurements.
- Digital Voltmeter (DVM): High-impedance input is preferred.
- Target Material: Often 4140 steel, representing the shaft material.
- Power Supply: For the proximity system.
- Known Good 7200 Probe and Proximitor: For comparison if troubleshooting.

The Calibration Process: A Step-by-Step Approach
Follow these steps carefully to ensure accurate calibration:
Initial Setup and Connections
- Mount the Proximitor: Securely mount the 7200 Proximitor in the calibration fixture.
- Connect the Probe: Attach the 5mm or 8mm proximity probe to the Proximitor.
- Power Up: Connect the power supply to the Proximitor. Most 7200 systems operate on -24 Vdc. Confirm this with your system’s manual.
- Connect DVM: Connect your DVM to the Proximitor’s output terminals.
Establishing the Target Gap
- Zero Gap: Carefully bring the target material into contact with the probe tip. Use the micrometer to ensure a true “zero” gap reading. The DVM should show a specific voltage, typically around -24V or close to the supply voltage.
- Incrementing the Gap: Slowly move the target away from the probe in precise increments. For 7200 systems, common increments are 1 mil (0.001 inch) or 25.4 microns. As the gap increases, the output voltage will become less negative (move towards 0V).
Recording and Validating Data
- Create a Data Log: As you increase the gap, record the corresponding voltage reading from your DVM.
- Linearity Check: Plot your recorded data (gap vs. voltage). For a healthy 7200 system, this plot should be nearly linear over its specified operating range. Deviations indicate a potential issue with the probe or proximitor.
- Sensitivity Check: Calculate the sensitivity (mV/mil or mV/micron). For 7200 systems, the typical sensitivity is around 200 mV/mil (7.87 V/mm). If your measured sensitivity is significantly off, the system is not calibrated correctly.
My Pro-Tip: The Importance of Environmental Factors
One factor often overlooked is the environment. Temperature fluctuations can affect the probe’s output. While calibrating, try to mimic the operating temperature of your machinery. Also, ensure there’s no electromagnetic interference. This can skew your readings. A stable environment is crucial for truly accurate calibration.

Final Thoughts and Next Steps
Proper calibration of your 7200 Proximity Systems is not just a best practice; it’s a necessity for accurate machinery monitoring and preventing costly failures. By following this guide, you ensure your DCS/PLC receives reliable data, leading to better operational decisions and extended equipment life.
For all your industrial control needs and to explore high-quality proximity system components, please click here to browse World of PLC Limited’s product range. We offer reliable solutions to keep your operations running smoothly.
| Model | Title | Link |
|---|---|---|
| 21505-22-55-10-02 | 8 Mm Probe Proximity Probe Bently Nevada | Learn More |
| 21508-02-12-50-02 | Bently Nevada 7200 Proximity Standard Mount Probe | Learn More |
| 21504-004-016-10-02 | Bently Nevada 8 Mm Proximity Probe | Learn More |
| 21504-000-016-10-02 | Bently Nevada 8 Mm Proximity Probe | Learn More |
| 21505-00-28-10-02 | Bently Nevada 7200 Proximity Standard Mount Probe | Learn More |


%20to%20Maintain%20DCS/PLC%20Input%20Accuracy%20As%20an%20operations%20manager%20with%2015%20years%20in%20industrial%20controls,%20I’ve%20seen%20firsthand%20how%20critical%20accurate%20sensor%20data%20is.%20From%20Bentley%20Nevada%20to%20GE%20and%20AB%20systems,%20the%20core%20principle%20remains:%20your%20control%20system%20is%20only%20as%20good%20as%20the%20data%20it%20%5B…%5D&media=https://worldofplc.com/wp-content/uploads/2025/06/Bently-Nevada-7200-Series-Proximity-Sensor-Installation-Calibration-Guide-3_.webp)